Scanning a URL encoded within a QR code and fetching its contents is particularly interesting because it addresses a common real-world scenario faced by developers. QR codes are widely used for sharing links, event details, and more, making it essential for iOS apps to handle them efficiently.
This post will not only guide developers through implementing QR code scanning using native frameworks like AVFoundation but also demonstrate how to seamlessly fetch and process the retrieved URL content using URLSession.
We will implement a client-server application where the server will provide a QR image and implement REST API services encoded within the QR code. The client will be an iOS app that scans the QR code and fetches the REST API service.
QR-Server
For the server, we will implement a Dockerized Node.js server to create a blank project.
npm init -y 
Later on, we will need to integrate ‘express’ and ‘qrcode’ into the project.
npm install express qrcode 
Server code is following:
const express = require('express');
const QRCode = require('qrcode');
const os = require('os');
const app = express();
const port = 3000;
const hostIP = process.env.HOST_IP || 'Desconocida';
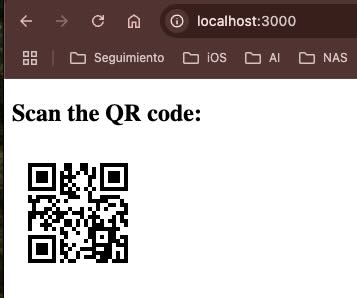
app.get('/', (req, res) => {
const url = `http://${hostIP}:${port}/data`;
QRCode.toDataURL(url, (err, qrCode) => {
if (err) res.send('Error generating QR code');
res.send(`<!DOCTYPE html><html><body>
<h2>Scan the QR code:</h2>
<img src="${qrCode}" />
</body></html>`);
});
});
app.get('/data', (req, res) => {
res.json({ message: 'Hello from QR-API-Server!' });
});
app.listen(port, () => {
console.log(`Server running on http://${hostIP}:${port}`);
}); This Node.js script sets up an Express.js web server that generates a dynamic QR code. When the root URL (“/”) is accessed, the server creates a QR code containing a URL pointing to the /data endpoint. The QR code is displayed on an HTML page with the message “Scan the QR code.”
Accessing the /data endpoint returns a JSON object with the message: “Hello from QR-API-Server!”. The server listens on port 3000, and the host IP address is either obtained from an environment variable or defaults to 'Desconocida' (Unknown) if not specified.
Next step: set up the Dockerfile.
# Base image for Node.js
FROM node:14

# Create and fix working dirctory
WORKDIR /usr/src/app

# Copy application files
COPY . .

# Install dependencies
RUN npm install

# Expose appliction port
EXPOSE 3000

# Command for starting server application
CMD ["node", "server.js"]
The Dockerfile sets up a Docker image for a Node.js application. It starts by using the official Node.js 14 base image. It then creates and sets the working directory to /usr/src/app. The application files from the local directory are copied into this working directory. Next, it installs the necessary dependencies using npm install. The image exposes port 3000, indicating that the application will listen on that port. Finally, the Docker container will run the Node.js server application by executing node server.js when started.
Get back to command line and create docker image:
docker build -t qr-server . 
And finally run the image:
docker run -d -p 3000:3000 \
-e HOST_IP=$(ifconfig | grep "inet " | grep -v 127.0.0.1 | awk '{print $2}' | head -n 1) qr-server
You need to provide the host Docker machine’s container runner IP to allow an iOS app running on a real device (due to camera scanning) to access the server.
QR Scaner iOS App
Client is an iOS sample Scan app designed to scan QR codes and call the service endpoint encoded within the QR code. To perform scanning, the app will require access to the camera.
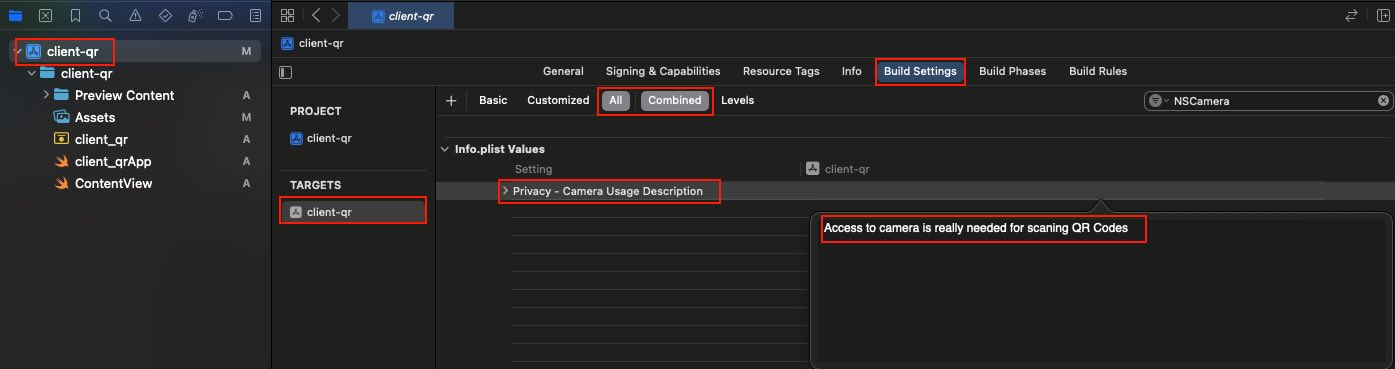
Open target build settings and fill in ‘Privacy – Camera Usage Description’. View code is following:
struct ContentView: View {
    @State private var scannedURL: String? = nil
    @State private var dataFromAPI: String? = nil
    @State private var showAlert = false
    @State private var alertMessage = ""

    var body: some View {
        VStack {
            if let scannedURL = scannedURL {
                Text("URL scanned: \(scannedURL)")

                    .padding()

                Button("Do API Call") {
                    Task {
                        await fetchAPIData(from: scannedURL)
                    }
                }
                .padding()

                if let dataFromAPI = dataFromAPI {
                    Text("Data from API: \(dataFromAPI)")
                        .padding()
                }
            } else {
                ZStack {

                    QRCodeScannerView {
                        self.scannedURL = $0
                    }
                    .edgesIgnoringSafeArea(.all)
                    Text("Scan QR code:")
                }

            }
        }
        .font(.title)
        .alert(isPresented: $showAlert) {
            Alert(title: Text("Error"), message: Text(alertMessage), dismissButton: .default(Text("OK")))
        }
    }

    func fetchAPIData(from url: String) async {
        guard let url = URL(string: url) else { return }

        do {
            let (data, response) = try await URLSession.shared.data(from: url)
            if let result = String(data: data, encoding: .utf8) {
                dataFromAPI = result
            }
        } catch {
            alertMessage = "Error: \(error.localizedDescription)"
            showAlert = true
        }
    }
}
SwiftUI code creates a ContentView that first scans a QR code to extract a URL, displays the scanned URL, and provides a button to fetch data from that URL via an API call, showing the result or an error alert if the request fails. The interface initially shows a QR scanner overlay with the prompt “Scan QR code,” and upon successful scanning, it displays the URL and a button to trigger the API call, which asynchronously retrieves and displays the data or shows an error message in an alert if something goes wrong. The layout uses a vertical stack (VStack) to organize the UI elements and adjusts fonts and padding for better readability.
QRCodeScannerView has to be implemented by using UIKit-UIViewControllerRepresentable bridge compontent:
import SwiftUI
import AVFoundation

struct QRCodeScannerView: UIViewControllerRepresentable {
    class Coordinator: NSObject, AVCaptureMetadataOutputObjectsDelegate {
        var parent: QRCodeScannerView

        init(parent: QRCodeScannerView) {
            self.parent = parent
        }

        func metadataOutput(_ output: AVCaptureMetadataOutput, didOutput metadataObjects: [AVMetadataObject], from connection: AVCaptureConnection) {
            if let metadataObject = metadataObjects.first {
                guard let readableObject = metadataObject as? AVMetadataMachineReadableCodeObject else { return }
                guard let stringValue = readableObject.stringValue else { return }
                AudioServicesPlaySystemSound(SystemSoundID(kSystemSoundID_Vibrate))
                parent.didFindCode(stringValue)
            }
        }
    }

    var didFindCode: (String) -> Void

    func makeCoordinator() -> Coordinator {
        return Coordinator(parent: self)
    }

    func makeUIViewController(context: Context) -> UIViewController {
        let viewController = UIViewController()
        let captureSession = AVCaptureSession()

        guard let videoCaptureDevice = AVCaptureDevice.default(for: .video) else { return viewController }
        let videoDeviceInput: AVCaptureDeviceInput

        do {
            videoDeviceInput = try AVCaptureDeviceInput(device: videoCaptureDevice)
        } catch {
            return viewController
        }

        if (captureSession.canAddInput(videoDeviceInput)) {
            captureSession.addInput(videoDeviceInput)
        } else {
            return viewController
        }

        let metadataOutput = AVCaptureMetadataOutput()

        if (captureSession.canAddOutput(metadataOutput)) {
            captureSession.addOutput(metadataOutput)

            metadataOutput.setMetadataObjectsDelegate(context.coordinator, queue: DispatchQueue.main)
            metadataOutput.metadataObjectTypes = [.qr]
        } else {
            return viewController
        }

        let previewLayer = AVCaptureVideoPreviewLayer(session: captureSession)
        previewLayer.frame = viewController.view.bounds
        previewLayer.videoGravity = .resizeAspectFill
        viewController.view.layer.addSublayer(previewLayer)

        Task {
            captureSession.startRunning()
        }
        return viewController
    }

    func updateUIViewController(_ uiViewController: UIViewController, context: Context) {}
}
The code creates a QR code scanner view that uses AVFoundation to capture and process QR codes, where it sets up a camera preview layer, configures a capture session to detect QR codes, and triggers a vibration and callback function (didFindCode) when a QR code is successfully scanned, passing the decoded string value to the parent view. The UIViewControllerRepresentable protocol bridges UIKit’s AVCaptureMetadataOutput functionality into SwiftUI, with a Coordinator class handling the metadata output delegation to process detected codes.
Important point for scanning you need to deploy on a real iOS device:
As soon as the QR code URL is read, it is presented to the user. When the user presses ‘Do API Call’, the iOS app performs a request to the service.
Conclusions
In this post I have presented how to consume API services where endpoints are could be dynamically provided by server via QR codes. If you’re interested in exploring the implementation further, you can find the source code used for this post in the following repository.
References
- Writing a Barcode Reader App in No Time
JaviOS Post