Implementing snapshot tests alongside regular unit tests is valuable because it addresses an often-overlooked aspect of testing: UI consistency. While unit tests verify business logic correctness, snapshot tests capture and compare UI renderings, preventing unintended visual regressions. This is especially useful in dynamic UIs, where small code changes might break layouts without being detected by standard tests.
By demonstrating how to integrate snapshot testing effectively, we aim to help developers enhance app stability, streamline UI testing, and adopt a more comprehensive test-driven approach.
Setup iOS Project
We willl creeate a regular iOS app project, with Swift test target (not XCTest):

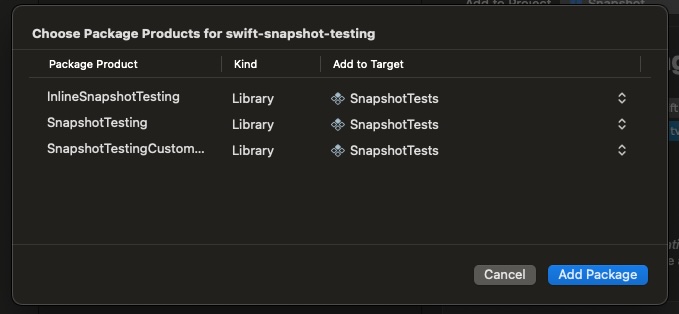
To include the swift-snapshot-testing package in your project, add it via Swift Package Manager (SPM) using the following URL: https://github.com/pointfreeco/swift-snapshot-testing.
Important: When adding the package, ensure you assign it to the test target of your project. This is necessary because swift-snapshot-testing is a testing framework and should only be linked to your test bundle, not the main app target.
We will continue by implementing the views that will be validated:
struct RootView: View {
    @State var navigationPath = NavigationPath()

    var body: some View {
        NavigationStack(path: $navigationPath) {
            ContentView(navigationPath: $navigationPath)
                .navigationDestination(for: String.self) { destination in
                    switch destination {
                    case "SecondView":
                        SecondView(navigationPath: $navigationPath)
                    case "ThirdView":
                        ThirdView(navigationPath: $navigationPath)
                    default:
                        EmptyView()
                    }
                }
        }
    }
}

struct ContentView: View {
    @Binding var navigationPath: NavigationPath

    var body: some View {
        VStack {
            Text("First View")
                .font(.largeTitle)
                .padding()

            Button(action: {
                navigationPath.append("SecondView")
            }) {
                Text("Go to second viee")
                    .padding()
                    .background(Color.blue)
                    .foregroundColor(.white)
                    .cornerRadius(10)
            }
            .accessibilityIdentifier("incrementButton")
        }
        .navigationTitle("First View")
    }

    func testButtonPress() {
        navigationPath.append("SecondView")
    }
}

struct SecondView: View {
    @Binding var navigationPath: NavigationPath

    var body: some View {
        VStack {
            Text("Second View")
                .font(.largeTitle)
                .padding()

            Button(action: {
                navigationPath.append("ThirdView")
            }) {
                Text("Go to third view")
                    .padding()
                    .background(Color.green)
                    .foregroundColor(.white)
                    .cornerRadius(10)
            }
        }
        .navigationTitle("Second View")
    }
}

struct ThirdView: View {
    @Binding var navigationPath: NavigationPath

    var body: some View {
        VStack {
            Text("Third View")
                .font(.largeTitle)
                .padding()

            Button(action: {
                // Pop to root
                navigationPath.removeLast(navigationPath.count) // Empty stack
            }) {
                Text("Get back to first view")
                    .padding()
                    .background(Color.red)
                    .foregroundColor(.white)
                    .cornerRadius(10)
            }
        }
        .navigationTitle("Third view")
    }
}
The provided SwiftUI code defines a navigation flow where a user can navigate through three views: FirstView, SecondView, and ThirdView. It uses a NavigationStack to manage the navigation path with a NavigationPath that is shared across views. In ContentView, the user can navigate to SecondView by pressing a button. In SecondView, the user can proceed to ThirdView with another button. In ThirdView, there is a button that clears the navigation stack, taking the user back to the FirstView. The navigation path is managed using the navigationPath state, and the specific view to navigate to is determined by the string values in the navigation path.
Snapshop testing
napshot testing in iOS is a method that focuses on verifying the visual elements of an app’s user interface, such as fonts, colors, layouts, and images. It involves capturing a screenshot of the UI and saving it as a reference image, then comparing it pixel by pixel with new screenshots taken during subsequent tests. This technique allows developers to quickly detect unintended visual changes or regressions caused by code modifications, ensuring UI consistency across different versions of the app. By automating visual verification, snapshot testing complements other testing methods, such as unit and integration tests, by specifically addressing the app’s visual aspects and helping maintain a high-quality user experience.
Swift Testing allows test functions to be parameterized. In our case, we will parameterize test functions based on the device screen we are interested in.
protocol TestDevice {
    func viewImageConfig() -> ViewImageConfig
}

struct iPhoneSe: TestDevice  {
     func viewImageConfig() -> ViewImageConfig {
        ViewImageConfig.iPhoneSe
    }
}

struct iPhone13ProMax: TestDevice  {
     func viewImageConfig() -> ViewImageConfig {
        ViewImageConfig.iPhone13ProMax(.portrait)
    }
}

struct iPhone12Landscape: TestDevice  {
     func viewImageConfig() -> ViewImageConfig {
         ViewImageConfig.iPhone12(.landscape)
    }
}
For our sample, we will use an iPhone SE, iPhone 13 Pro Max, and iPhone 12 (in landscape mode). Finally, the test itself:
@MainActor
@Suite("Snapshot tests")
struct SnapshotTests {

    var record = true // RECORDING MODE!
    static let devices: [TestDevice] = [iPhoneSe(), iPhone13ProMax(), iPhone12Landscape()]

    @Test(arguments: devices) func testFirstView(device: TestDevice) {
        let rootView = RootView()
        let hostingController = UIHostingController(rootView: rootView)
        var named = String(describing: type(of: device))
        assertSnapshot(of: hostingController,
                       as: .image(on: device.viewImageConfig()),
                       named: named,
                       record: record)
    }

    @Test(arguments: devices) func testSecondView(device: TestDevice) {
        let secondView = SecondView(navigationPath: .constant(NavigationPath()))
        let hostingController = UIHostingController(rootView: secondView)

        var named = String(describing: type(of: device))

        assertSnapshot(of: hostingController,
                       as: .image(on: device.viewImageConfig()),
                       named: named,
                       record: record)
    }

    @Test(arguments: devices) func testThirdView(device: TestDevice) {
        let thirdView = ThirdView(navigationPath: .constant(NavigationPath()))
        let hostingController = UIHostingController(rootView: thirdView)

        var named = String(describing: type(of: device))

        assertSnapshot(of: hostingController,
                       as: .image(on: device.viewImageConfig()),
                       named: named,
                       record: record)
    }
}
We have defined a test function for each screen to validate. On the first execution, var record = true, meaning that reference screenshots will be taken. Run the test without worrying about failure results.
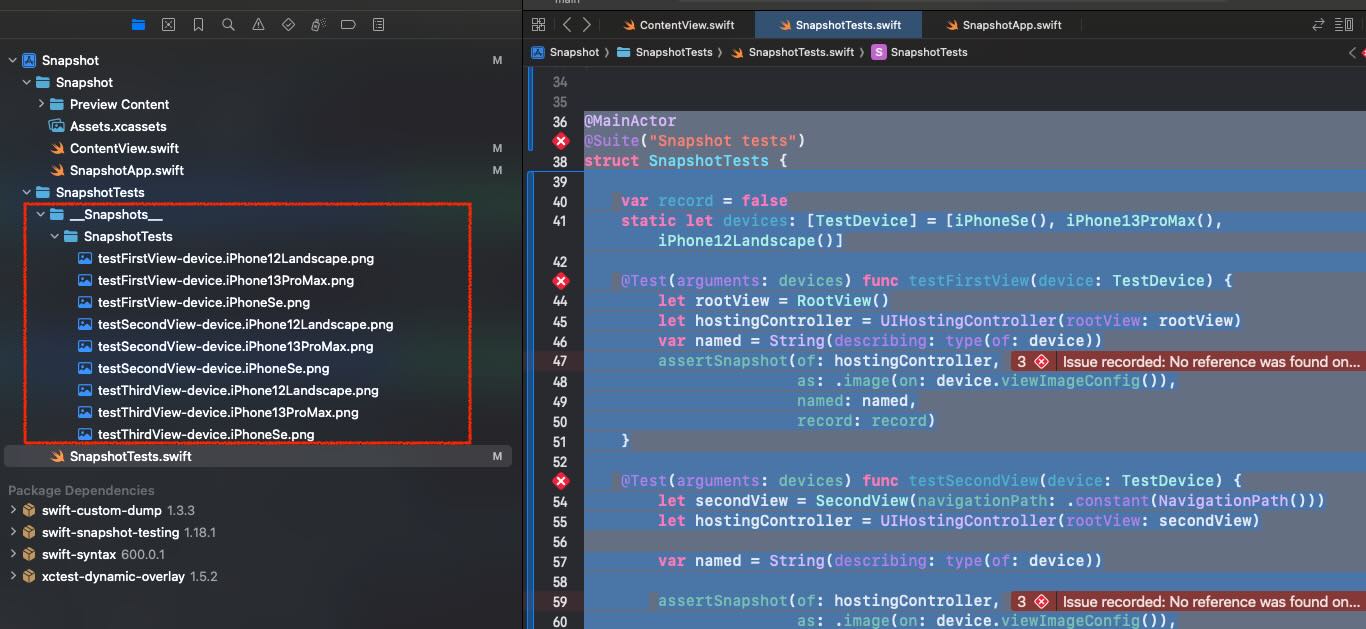
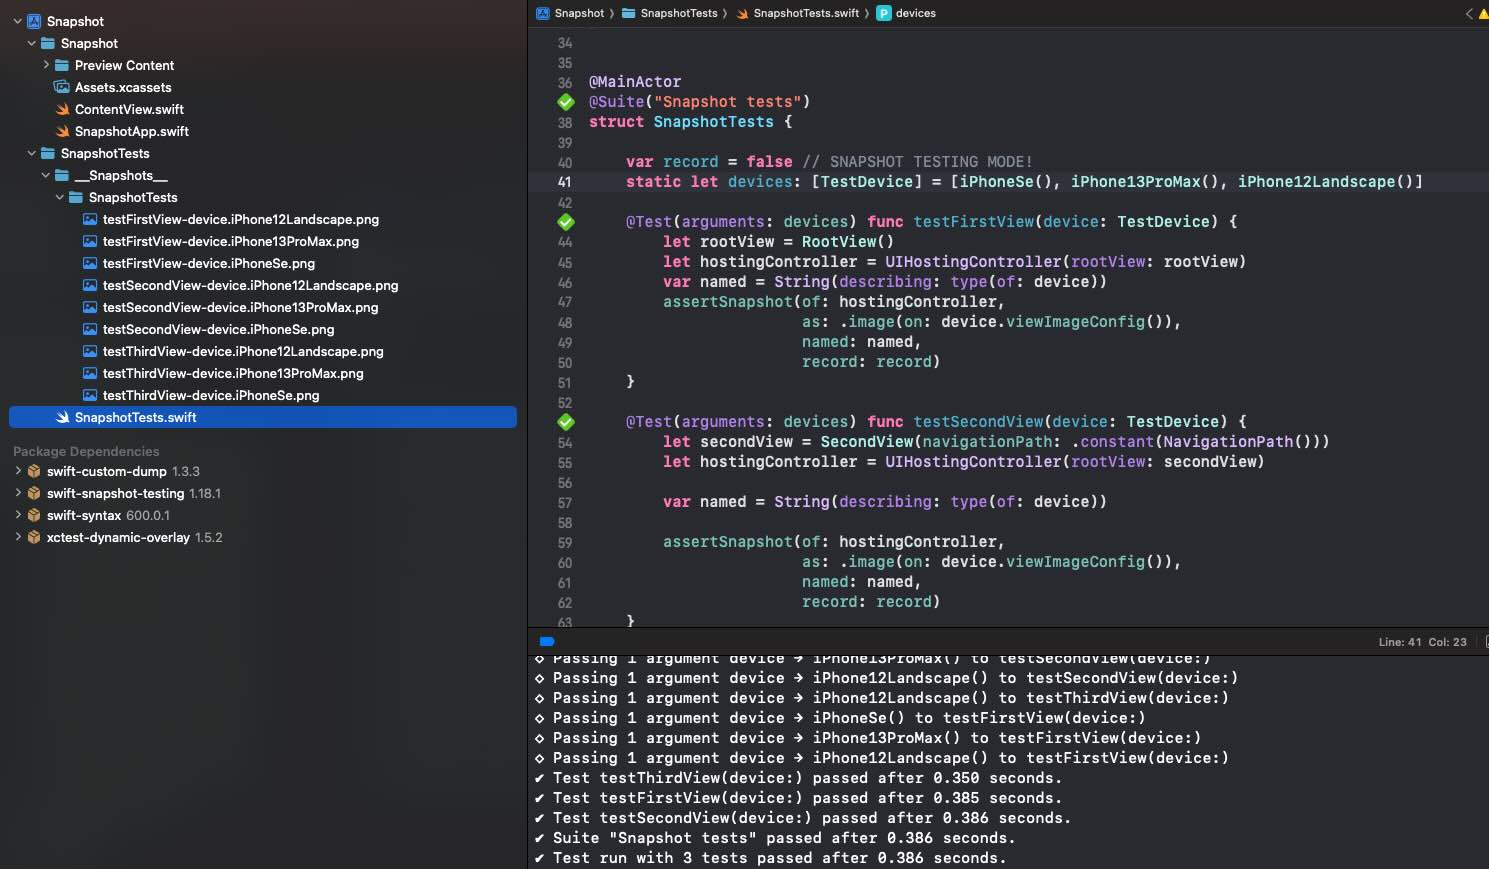
The important point is that a new folder called __Snapshots__ has been created to store the taken snapshots. These snapshots will serve as reference points for comparisons. Don’t forget to commit the screenshots. Now, switch record to false to enable snapshot testing mode
...
var record = false // SNAPSHOT TESTING MODE!
...
Run the test and now all must be green:
Do test fail!
Now we are going to introduce some changes to the view:
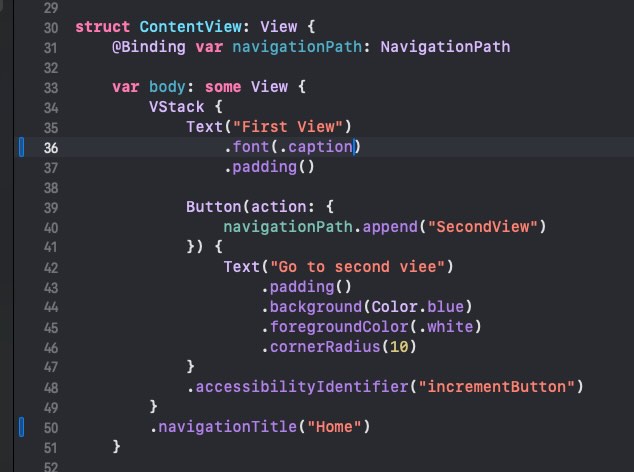
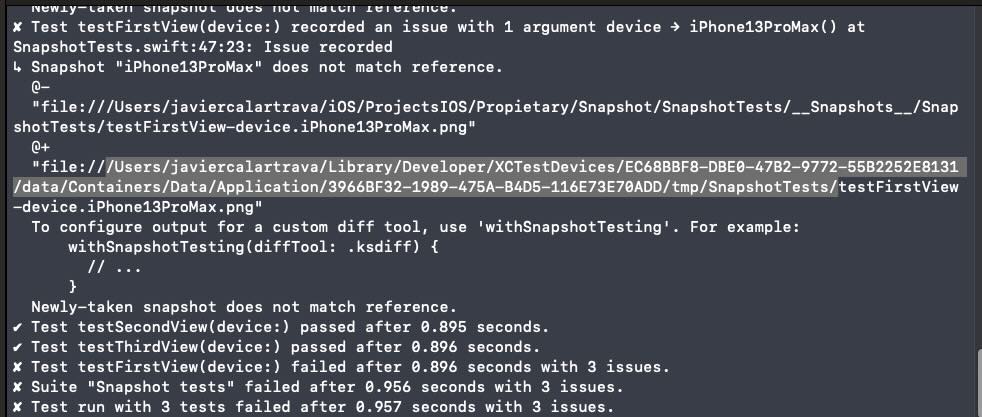
Launch test: We now face issues where the tests validating ContentView are failing:
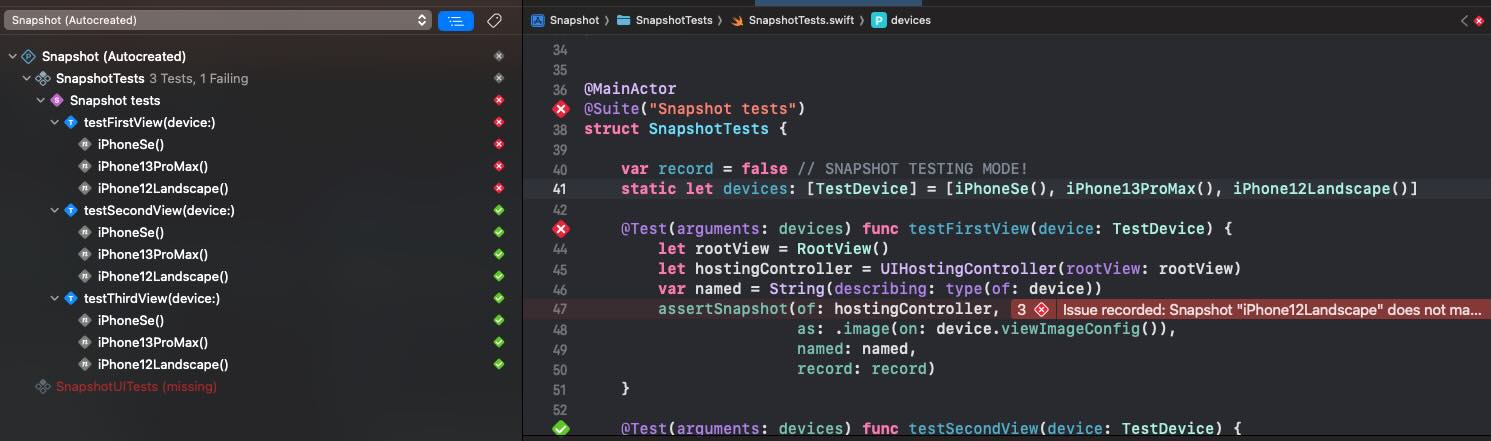
When we review logs, we can see in which folder the snapshots are stored.
With your favourite folder content comparator compare both folders:
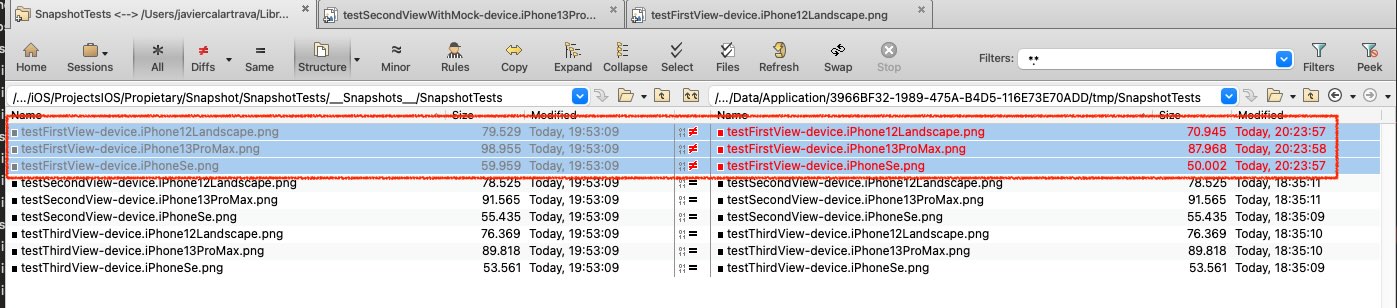
In my case, I use Beyond Compare, click on any file pair:
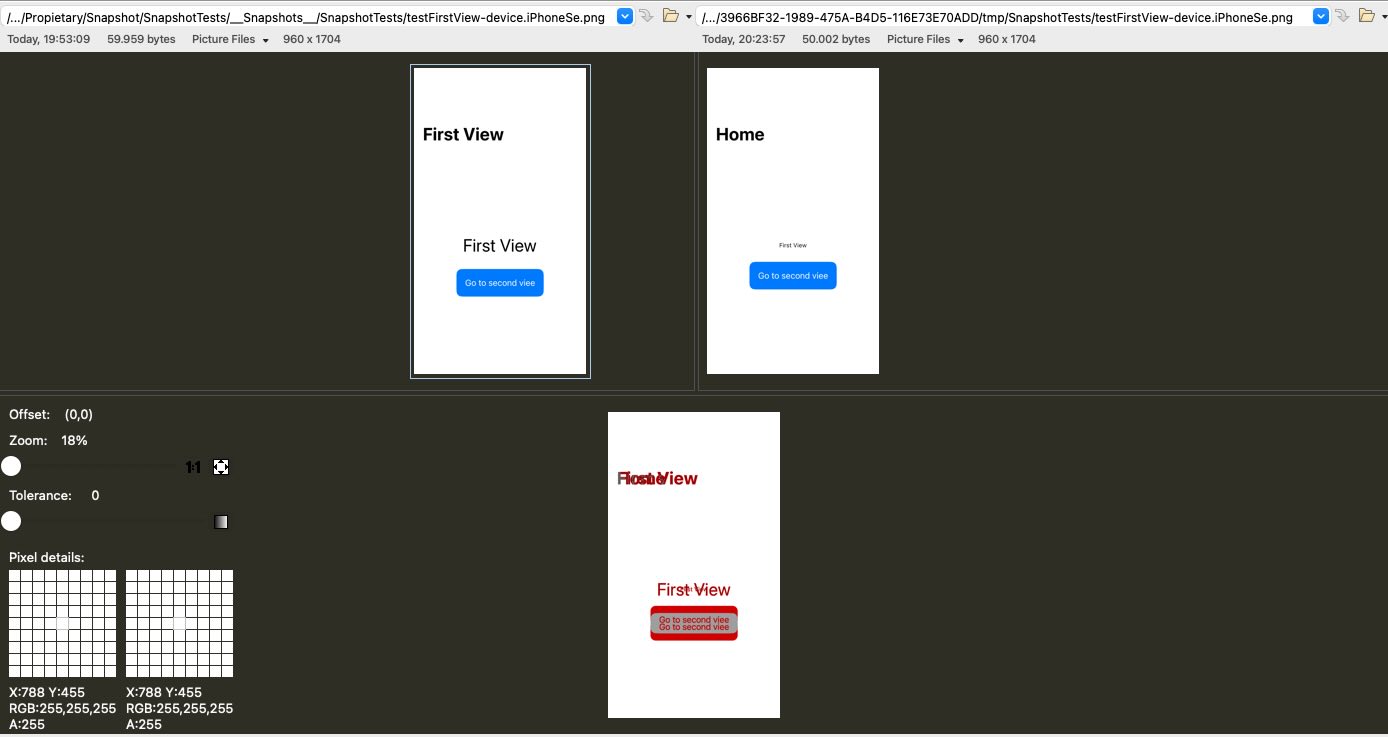
With the image comparator included in BeyondCompare we can easily see with view components have changed.
Conclusions
Snapshot testing is a valuable complement to unit testing, as it enables you to detect regressions in views more effectively. If you’re interested in exploring the implementation further, you can find the source code used for this post in the following repository.
References
- swift-snapshot-testing
GitHub repository
- Beyond Compare
Folder, test file, images comparator